
How to Fix a Bike Puncture: A Step-by-Step Roadside Guide
A puncture doesn’t have to end your ride. Here’s how to find the cause, change an inner tube and get safely back on the road or trail.
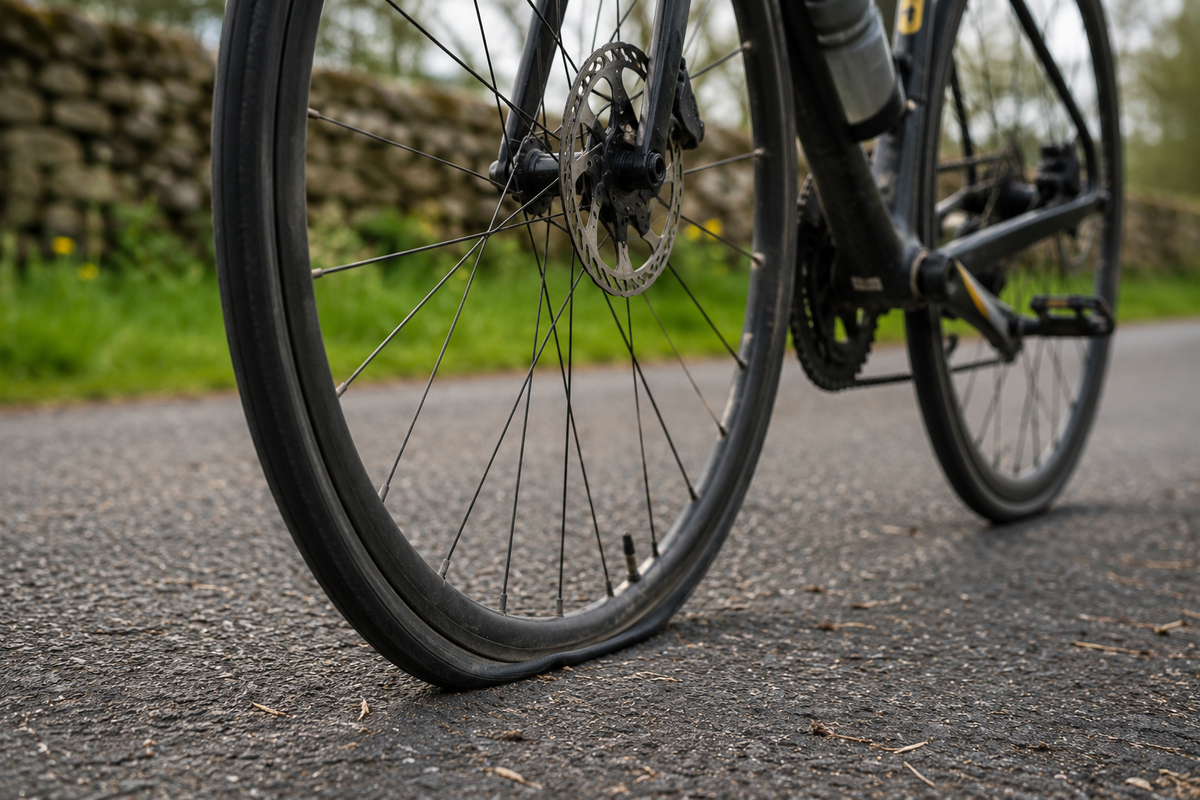
A flat tyre is one of those cycling problems that feels much bigger when you don't know how to deal with it.
Once you've done it a few times, it's different. Find somewhere safe, remove the wheel, find what caused the puncture, fit a good tube, inflate the tyre and carry on.
For a conventional tyre with an inner tube, you'll normally need a spare tube, tyre levers and a pump. A patch kit is useful backup, particularly on longer rides. If you're running tubeless, the first response is different, so we've covered that further down.
The most important part isn't doing the repair quickly. It's finding why the tyre went flat. Miss the thorn, piece of glass or damaged rim tape that caused the first puncture and your fresh inner tube may last only a few metres.
What do you need to fix a puncture?
For a straightforward roadside tube change, carry:
- Correctly sized spare inner tube
- Two plastic tyre levers
- Mini pump
- Patch kit as backup
Depending on your bike and the ride, you might also carry:
- Tubeless plugs and insertion tool
- CO2 inflator
- Tyre boot
- Small multitool
- Second spare tube on longer rides
Make sure your spare tube actually fits your wheel and tyre, including the valve type and valve length.
Deep-section rims, in particular, need a sufficiently long valve.
British Cycling recommends plastic rather than metal tyre levers because metal levers can damage rims, and advises learning to refit the tyre by hand where possible rather than levering it back on and risking damage to the new tube.
And yes, you can use CO2. It's fast and compact. But for everyday riding we still like having a pump available. A cartridge gives you a finite number of attempts. A pump doesn't.
Step 1: Get yourself somewhere safe
Before touching the bike, get out of danger.
If you're on the road, move well away from traffic where possible. Look for a gateway, pavement where cycling access permits you to stop without obstruction, wide verge, car park or another safe place where you have room to work.
A puncture is annoying. Repairing one with traffic passing inches from your shoulder is unnecessary.
Once you're somewhere sensible, work out which tyre has gone flat.
If there's an obvious nail, thorn or piece of debris sticking out, note where it is before removing anything. That location may help you identify the corresponding hole in the tube.
Step 2: Remove the wheel
Front wheel
The front is usually straightforward.
Depending on the bike, you'll have a quick-release skewer, thru-axle or, on some bikes, axle nuts.
If you have rim brakes, you may also need to release the brake before the inflated tyre can pass through the brake pads.
Remove the wheel according to the system fitted to your bike.
Rear wheel
A rear puncture looks more complicated because the chain and rear derailleur are involved, but there's a simple trick.
Shift onto the smallest sprocket at the rear before removing the wheel.
That puts the chain in the position that generally makes removal and refitting easiest on a derailleur-equipped bike. Cycling UK's roadside guidance uses the same approach.
Open the quick release or remove the thru-axle, then carefully move the derailleur backwards as you guide the wheel out.
Don't force anything.
Once the wheel is out, put the bike somewhere stable. If you have to lay it down, keep the drivetrain and derailleur side facing upwards.
Step 3: Check what caused the puncture
This is the step worth slowing down for.
Look carefully around the outside of the tyre for:
- Glass
- Flint
- Thorns
- Nails
- Screws
- Wire
- Cuts
- Other embedded debris
Remove anything you find, but don't stop looking simply because you've found one culprit. There could be more than one.
Cycling UK recommends checking all the way around the tyre, starting from the valve, even after finding one possible cause.
If you can't see anything obvious, you'll inspect the inside of the tyre once the tube is removed.
Step 4: Remove one side of the tyre
Let out any remaining air.
Push the tyre bead towards the centre channel of the rim around the wheel. This creates a little more slack and can make a tight tyre considerably easier to remove.
Start somewhere away from the valve.
Insert a plastic tyre lever underneath the tyre bead and carefully lift it over the rim. If necessary, insert the second lever a short distance away and repeat.
Once you've freed enough of the bead, you can often slide a lever around the rim or continue by hand until one complete side of the tyre is outside the rim.
You generally do not need to remove the tyre completely from the wheel just to replace an inner tube.
Step 5: Remove the punctured inner tube
Pull the tube gently from inside the tyre, leaving the valve until last.
If there's a retaining nut on the valve, remove it first.
Keep some sense of how the tube was positioned relative to the tyre. This can be surprisingly useful.
If you find a hole in the tube, you can then compare its position with the corresponding area of tyre and rim. Cycling UK specifically recommends using the tube's orientation to help trace the cause.
Step 6: Find the hole
If you're fitting a spare tube at the roadside, you don't strictly need to repair the punctured tube immediately.
But finding the hole can tell you why the puncture happened, and that's important.
Put some air into the old tube.
A reasonably sized puncture may hiss loudly enough to hear. For a smaller one, slowly move the inflated tube near your face or ear and listen and feel for escaping air.
At home, submerging sections of the tube in water and looking for bubbles can locate tiny leaks.
The shape and location of the hole can also provide clues.
One small hole
Often suggests something penetrated the tyre, such as glass, a thorn or sharp debris.
Find the corresponding place in the tyre and inspect it closely.
Two small holes close together
The classic snakebite or pinch puncture.
This can happen when the tyre and tube are compressed hard enough for the tube to be pinched between the tyre and rim, often after striking a pothole or sharp edge.
Cycling UK notes that insufficient tyre pressure is a common contributor.
Hole on the rim side of the tube
Look at the rim tape.
A spoke hole, exposed spoke end or damaged/misaligned rim tape can puncture the tube from the inside.
Damage around the valve
This can indicate movement or damage around the valve area and may not be realistically repairable at the roadside.
Understanding the cause matters because simply fitting another tube doesn't fix a problem with the tyre or wheel.
Step 7: Check inside the tyre
Before the new tube goes anywhere near the wheel, inspect the inside of the tyre.
Carefully work your way around the entire casing.
You're looking and feeling for anything still protruding through it.
Take care when using your fingers. The thing you're trying to find could be sharp.
Park Tool recommends inspecting both the outside tread and inside casing because nails, glass and other debris can remain embedded after a puncture.
This might be the most important thirty seconds of the entire repair.
Put a new tube straight onto a shard of glass and you'll very efficiently turn one puncture into two.
Step 8: Fit the replacement inner tube
Put a small amount of air into the replacement tube.
You don't want it inflated properly. Just enough air to give it some shape makes it easier to position without twists or folds.
Put the valve through the rim first, then gently work the tube into the tyre all the way around.
Check that it sits evenly inside the tyre.
Don't pull, stretch or twist it unnecessarily.
Step 9: Refit the tyre
Now work the loose tyre bead back over the rim.
Start opposite the valve and work around both sides towards it, pushing the bead into the central well of the rim as you go. This creates more slack for the final section.
Try to finish using your hands.
Using a tyre lever to force the final section back onto the rim can catch the new inner tube between the lever and rim, leaving you with another puncture before you've even inflated it.
If the final section is extremely tight, go back around the wheel and make sure the bead you've already fitted is sitting down in the deepest part of the rim.
Often, that little bit of extra slack is all you need.
Step 10: Check you haven't trapped the tube
Before pumping the tyre up properly, inspect it.
Look around both sides of the wheel and make sure the inner tube isn't visible between the tyre bead and rim.
Push the valve slightly up into the tyre and back down again. This can help ensure the tube isn't trapped underneath the tyre bead around the valve.
Then add a little air.
Go around the wheel once more and check that everything looks even.
Cycling UK's guidance recommends checking that the tube isn't trapped and that the tyre's moulding line follows the rim evenly before fully inflating.
Only then should you bring the tyre up to an appropriate riding pressure.
Step 11: Refit the wheel
For the front wheel, make sure it's properly located and secure the thru-axle, quick release or axle nuts correctly.
For the rear, position the chain around the smallest sprocket and guide the wheel carefully back into the frame while moving the derailleur out of the way as necessary.
Secure the axle.
If you released rim brakes earlier, reconnect them.
Then spin the wheel.
Check that:
- The wheel is secure
- The tyre is seated evenly
- The wheel rotates normally
- The brake isn't rubbing excessively
- The brakes work
- Nothing looks or sounds wrong
Don't discover two miles later that you forgot to reconnect a brake.
Should you patch the tube or replace it?
At the roadside, fitting a spare tube is often quicker and easier.
Keep the punctured tube and repair it properly later.
Traditional vulcanising patches can make durable repairs when applied correctly, but the tube needs to be prepared properly and the adhesive given time to work. That's considerably easier somewhere warm and dry than beside a wet British lane.
Cycling UK specifically recommends using a spare tube in wet conditions because patching becomes much more difficult when everything is damp.
A patch kit is still worth carrying.
One puncture uses your spare. The second makes the patch kit suddenly much more interesting.
What if the tyre itself is cut?
A replacement tube won't solve a badly damaged tyre casing.
If there's a significant cut or tear, the inflated tube may push through the opening and fail.
A tyre boot is designed to reinforce the inside of a damaged tyre temporarily so you can get home.
It's an emergency repair, not a permanent fix.
If the tyre has substantial sidewall damage, exposed casing, a damaged bead or a bulge, replace it rather than treating a roadside bodge as a long-term solution. Cycling UK similarly advises replacing tyres showing cuts, swelling or exposed casing.
What if your bike is tubeless?
Tubeless changes the process.
A small puncture may seal before you even realise you've had one. You might see some sealant spray from the tyre and then watch it stop.
If it doesn't seal, rotate the puncture towards the bottom of the wheel so sealant can reach it and give it a little time.
For a hole too large for sealant alone, a tubeless plug may allow you to repair it without removing the wheel or tyre.
Insert the plug according to your repair system's instructions, allow the sealant to work around it and reinflate the tyre.
But tubeless isn't magic.
If the tyre won't seal because of a larger cut, damaged valve, failed tape or another problem, you may need to remove the tubeless valve and install an ordinary inner tube to get home.
That's why we still recommend carrying a tube on a tubeless bike, particularly when riding further from home. Cycling UK makes the same point: tubeless tyres can still suffer holes that don't self-seal, so a repair kit remains necessary.
Be prepared for the inside of the tyre to be messy.
That's sealant doing what sealant does.
Why do I keep getting punctures?
One puncture can be bad luck.
Repeated punctures deserve investigation.
Check for:
- Worn or damaged tyres
- Embedded glass or flint
- Incorrect tyre pressure for your setup
- Damaged or displaced rim tape
- Sharp edges around the rim
- Tubes being pinched during installation
- Tyres unsuitable for the surfaces you're regularly riding
- Old or dried-out tubeless sealant
Regularly inspecting tyres for cuts, wear and embedded debris can catch some problems before they become roadside repairs. Cycling UK also recommends regular pressure checks and inspection for sidewall cuts or bulges.
Don't automatically assume the answer is simply pumping the tyre as hard as possible. Appropriate pressure depends on the tyre, rim, rider, load and riding conditions.
Can you ride a bike with a puncture?
Generally, don't.
Riding any meaningful distance on a completely flat tyre risks damaging the tyre and rim and gives you very poor control of the bike.
Stop somewhere safe and repair it.
If the damage can't be repaired, that's when the phone and payment card in your ride kit earn their place.
A train, taxi or reluctant lift home is cheaper than destroying a wheel to save a walk.
Practise before you need to do it
The best place to learn how to change an inner tube isn't at the side of the road.
Take a wheel off at home.
Remove the tyre.
Take the tube out.
Put it all back together.
Then do it again.
Cycling UK explicitly recommends practising puncture repairs at home. Familiarity builds confidence, and after a few attempts the process becomes much less intimidating.
It also reveals useful things about your particular bike. Maybe the rear thru-axle is awkward. Perhaps your tyre and rim combination is unusually tight. Maybe the tiny pump you've been carrying for three years is dreadful.
Much better to discover all of that in the garage than halfway through Sunday's ride.
The five-minute habit that can prevent the next puncture
You can't prevent every flat.
You can improve the odds.
Every so often, inspect your tyres closely. Remove embedded glass and flint before it works further through the casing. Look for cuts, wear and damage. Keep an eye on tyre pressure and investigate unexplained pressure loss rather than repeatedly topping it up.
And periodically check the repair kit you carry.
Is the spare tube still sound?
Does it fit the bike you're currently riding?
Is your pump working?
Are the tyre levers actually in the saddle bag?
If you run tubeless, is the sealant still doing its job?
A puncture kit isn't particularly useful if the first time you inspect it in two years is when you're sitting beside a hedge.
Fix it. Learn from it. Keep riding.
Punctures are part of cycling.
They're frustrating, badly timed and strangely attracted to cold fingers and approaching rain. But they don't need to end the ride.
Carry the right equipment. Learn how your own wheels and tyres work. Find the cause before fitting the replacement. Take your time putting everything back together.
After you've fixed a few, a puncture stops being a disaster.
It becomes a ten-minute interruption to wherever you were going.
And that's exactly how it should be.